Mapping Name-Value Cells | ||
| ||
Double-click the Excel component icon
 .
.The Excel Component Editor appears.
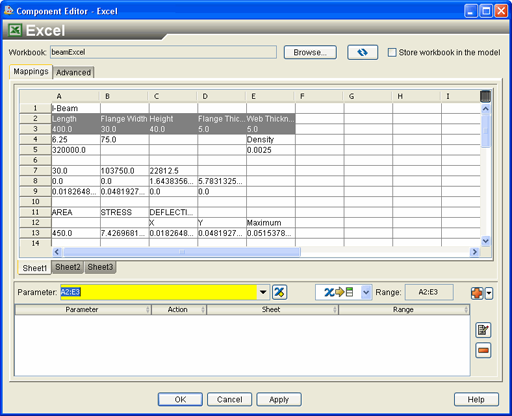
From the Excel Component Editor, select the range of cells that contains both the names for the parameters that you are mapping and the associated values.
The selected range must contain either 2 rows or 2 columns, with the names of the parameters assumed to be in the left or top cells.
In the following example five parameters are mapped: Length, FlangeWidth, Height, FlangeThickness, and Web Thickness, whose values are in cells A3 through E3, respectively.
Select the mapping direction:
-
 . This option maps the value from an Isight
parameter to Excel.
. This option maps the value from an Isight
parameter to Excel. -
 . This option maps the value from Excel to an Isight
parameter.
. This option maps the value from Excel to an Isight
parameter.
-
Click the arrow next to the
 button, and select Add Name-Value Mapping.
Scalar parameters are created automatically based on the names in the selected range and are mapped to the corresponding adjacent value cells. In addition, your mappings are added to the list at the bottom of the editor.
To delete a mapping, select it and click the
 button, if desired.